Sira Vetting Requests Page
After clicking the Vetting Requests sidebar menu item, you'll access the Vetting Requests page. This specialized section allows job seekers to proactively request vetting (skill assessments, background checks, or certification verifications) in specific areas to strengthen their profile and stand out to recruiters. It's a powerful tool for demonstrating your qualifications upfront, building trust with employers, and accelerating the hiring process.
The page provides a dashboard to create new requests, manage ongoing vetting processes, and track results. Recruiters can review these requests to validate your skills before or during the application process. The interface is intuitive and responsive, ensuring easy management on any device. Below, we'll cover the layout, features, and step-by-step instructions for creating and managing vetting requests.
Page Overview
The Vetting Requests page features a structured, table-based layout focused on organization and progress tracking:
- Header: Displays the page title "Vetting Requests" with standard top navigation (Sira logo, search bar, profile icon).
- Left Sidebar: The familiar collapsible navigation (Dashboard, Jobs, Applications, Messages/Requests, Files, Tasks, Vetting Requests).
- Main Content Area:
- Page Subtitle/Description: Helpful text like "Vetting Requests Component: Update Vetting Table Usage" explaining the feature.
- Action Buttons: Prominent options to create or refresh requests.
- Vetting Requests Table: A sortable table listing all your requests with status indicators.
- Footer: Standard Sira footer with copyright information.
The design emphasizes transparency with clear status columns and color-coded badges. Vetting requests can cover technical skills (e.g., coding assessments), soft skills (e.g., communication evaluations), or professional verifications (e.g., degree checks), helping you showcase verified competencies.
Main Controls and Actions (Top Section)
At the top-right of the main area, you'll find essential buttons for managing your vetting activities.
1. New Request Button
- A prominent blue button labeled "New Request" or "Create Vetting Request".
- How to Use:
- Click the button to open a creation modal or form.
- See the "Creating a Vetting Request" section below for detailed steps.
- This is the primary way to initiate vetting for specific skills or qualifications.
2. Refresh/Update Button
- An icon or button like "Update Table" (circular arrow 🔄) to reload the latest status from recruiters or Sira's system.
- How to Use:
- Click to fetch real-time updates on pending requests.
- Useful after receiving notifications or if statuses seem outdated.
3. Search/Filter Options
- A search bar above the table for finding specific requests (e.g., by skill area or date).
- Filters might include: Status (Pending, In Progress, Completed, Rejected), Date Range, or Skill Category.
- How to Use:
- Enter keywords (e.g., "Python" or "Leadership").
- Select filters to narrow the view (e.g., "Pending Only").
- Results update the table dynamically.
Pro Tip: Use filters to focus on actionable items, like pending requests needing follow-up.
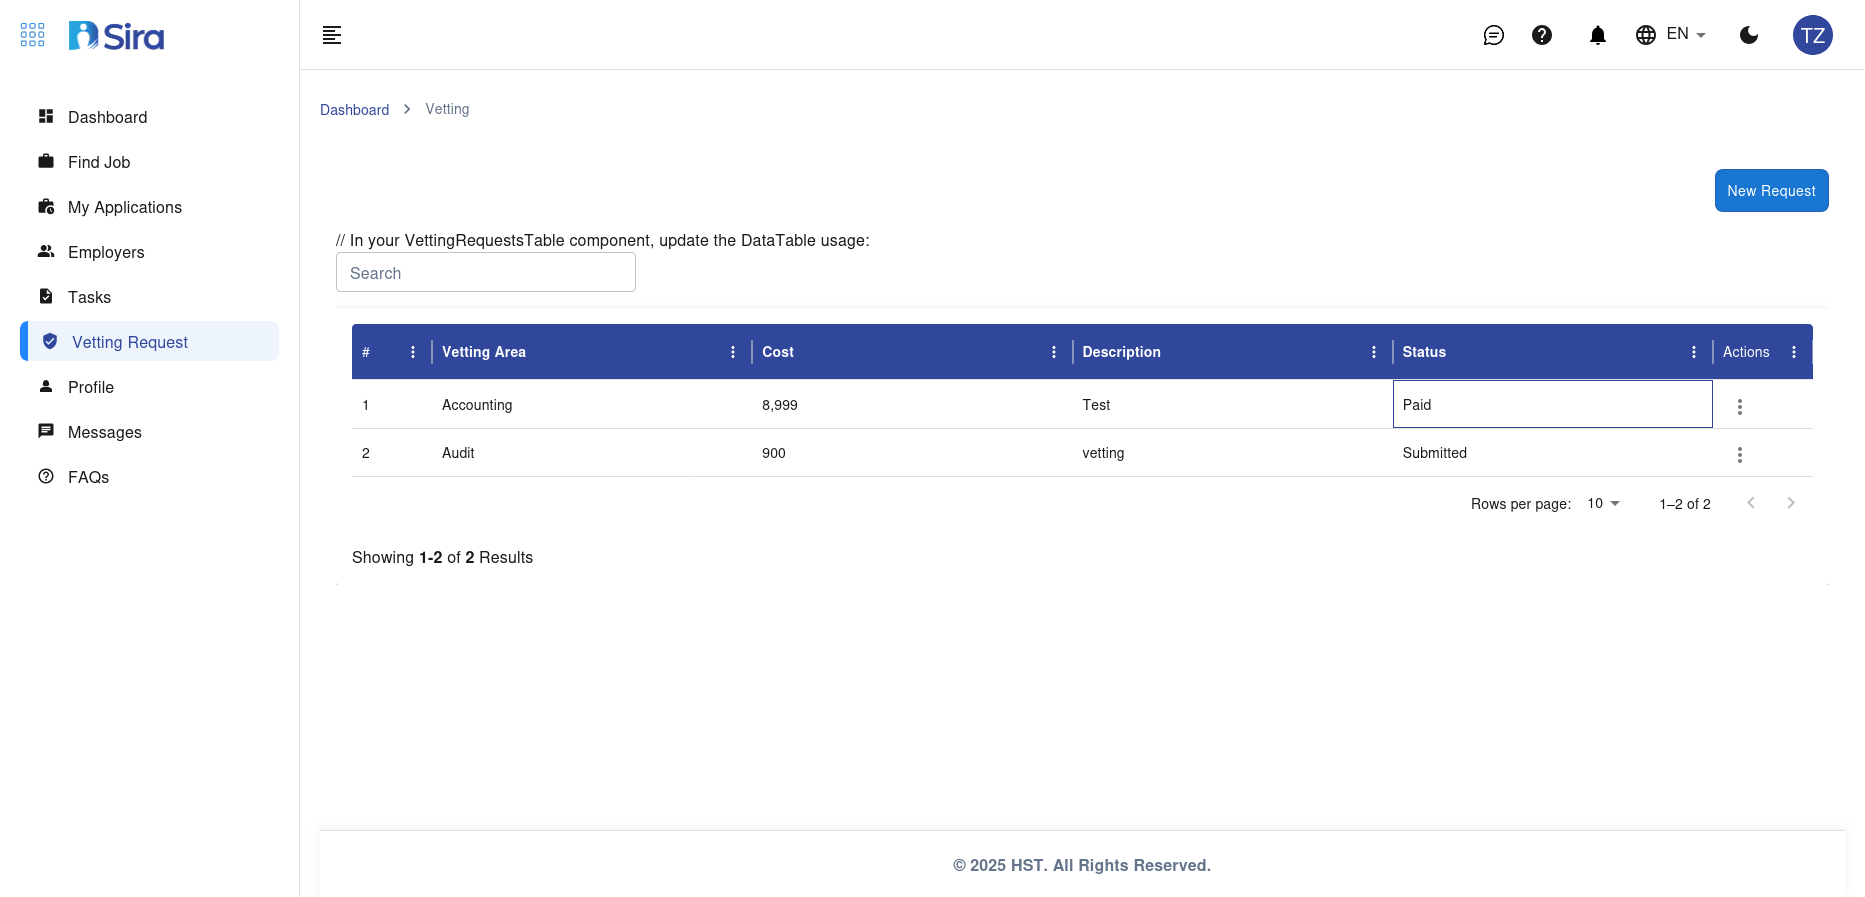
Vetting Requests Table (Main Content)
The core of the page is a clean, tabular view of all your vetting requests. It's designed for quick scanning, with columns providing key details at a glance. The table supports sorting by clicking column headers and pagination for large lists.
Table Structure and Columns
Based on the interface, the table includes the following columns (from left to right):
-
# (Request ID):
- A unique identifier for each request (e.g., "#1", "#2").
- Purpose: Easy reference when communicating with support or recruiters.
- How to Use: Click the ID to open full details in a modal.
-
Vetting Area:
- The specific skill, certification, or qualification being vetted (e.g., "Python Programming", "Project Management Certification", "Data Analysis Skills").
- Details: May include a brief description or linked document.
- How to Use: Hover for more info; click to edit if status allows.
-
Cost:
- Associated fee (if applicable) for the vetting service (e.g., "$50", "$0" for free assessments).
- Purpose: Transparency on any costs; Sira may subsidize or offer free options.
- How to Use: Paid requests show payment status (e.g., "Paid" or "Pending Payment").
-
Test:
- Type of assessment or method (e.g., "Online Quiz", "Coding Challenge", "Interview Simulation", "Document Verification").
- Details: Includes provider (e.g., "Powered by HackerRank") or duration (e.g., "30 min").
- How to Use: Click to access the test if ready (e.g., "Start Test").
-
Status:
- Color-coded badge indicating progress:
- Blue (Pending): Request submitted, awaiting recruiter assignment or your action.
- Green (In Progress): Assessment underway (e.g., taking the test or under review).
- Yellow (Scheduled): Vetting date set.
- Red (Rejected/Expired): Not approved or timed out.
- Purple (Completed): Verified with results (e.g., "Passed: 85%").
- How to Use: Click the badge for a status history timeline.
- Color-coded badge indicating progress:
-
Actions:
- Quick buttons for each row:
- View (eye icon): Open full details and results.
- Edit (pencil icon): Modify request if not started.
- Delete/Cancel (trash icon): Remove if withdrawn.
- Share (link icon): Generate a shareable link for recruiters.
- Results (if completed): Download certificate or report.
- Quick buttons for each row:
Sample Table Entries (Based on the Interface)
The table might look like this with example data:
| # | Vetting Area | Cost | Test | Status | Actions |
|---|---|---|---|---|---|
| 1 | Python Programming Skills | $0 | Coding Challenge | In Progress | View, Edit |
| 2 | PMP Certification Verify | $25 | Document Upload | Pending | Start Test |
| 3 | Data Analysis Proficiency | $0 | Online Quiz | Completed | Download Results |
| 4 | Leadership Assessment | $50 | Interview Sim | Rejected | Delete |
- Visual Elements: Rows alternate colors for readability; overdue requests highlight in red.
- Empty State: If no requests, a message like "No vetting requests yet. Create one to boost your profile!" appears with a call-to-action button.
How to Interact with the Table
- Sort and Filter: Click column headers (e.g., "Status") to reorder; use top filters for subsets.
- View Details: Click a row or "View" button to expand:
- Full request info: Description, recruiter assigned (if any), timeline.
- Progress tracker: Steps like "Submitted → Assigned → Completed".
- Attached files: Your submissions or results.
- Take Actions:
- Start/Complete Test: For pending items, click to launch the assessment.
- Follow Up: If stalled, use an integrated "Remind Recruiter" button.
- Download Results: For completed requests, get PDFs or badges for your profile/resume.
- Pagination: Use "Next/Previous" or page numbers at the bottom for more entries.
- Bulk Actions: Select rows (checkboxes) to delete, export, or resend multiple requests.
Integration Note: Completed vetting results automatically update your profile (e.g., add "Verified Python Expert" badge) and appear in job applications.
Step-by-Step: Creating a Vetting Request
- Access the Page: Click Vetting Requests in the sidebar.
- Initiate Request: Click "New Request" (top-right).
- Fill the Form (Modal Opens):
- Select Vetting Area: Choose from categories (e.g., "Technical Skills", "Certifications", "Soft Skills") or type a custom one (e.g., "Advanced SQL Querying").
- Describe Request: Add details (e.g., "Verify 3+ years of Python experience with a coding test focusing on web scraping and data visualization").
- Choose Test Type: Pick from options (e.g., "Automated Quiz", "Live Coding", "Peer Review", "Third-Party Verification").
- Set Preferences: Optional—specify timeline (e.g., "Complete within 7 days"), budget, or target audience (e.g., "For Tech Recruiters").
- Attach Evidence: Upload resume sections, certificates, or code samples.
- Review Cost: Confirm any fees; free options are prioritized.
- Submit: Click "Submit Request"—it appears in the table as "Pending".
- Monitor Progress: Refresh the table or wait for notifications (email/in-app) when a recruiter responds or the test is ready.
Time Estimate: Creation takes 2-5 minutes; processing varies (1-14 days depending on type).
Managing Ongoing Requests
- Check Status: Use the table to identify pending items (e.g., blue badges).
- Complete Assessments: For "In Progress" requests, follow links to take tests or submit docs.
- Follow Up: If no response in 3-5 days, click "Remind" in details—sends a polite message via Messages.
- Handle Rejections: Review reasons (e.g., "Insufficient Evidence") and resubmit with improvements.
- Archive Completed: Once done, results integrate into your profile; optionally delete old requests.
Additional Features
1. Vetting Categories and Providers
- Predefined Areas: Technical (Coding, Tools), Professional (Certifications, Experience), Personal (Assessments).
- Partners: Sira integrates with platforms like LinkedIn Skills, Coursera Verify, or custom Sira tools.
- How to Use: Browse categories during creation for guidance.
2. Notifications and Sharing
- Alerts: Real-time updates on status changes, test availability, or recruiter feedback.
- Shareable Links: Generate URLs to send to specific employers (e.g., "View my verified skills").
- How to Use: Enable in Profile > Notifications; share via Messages or email.
3. Analytics and Insights
- A summary card: "3 Requests Active | 80% Completion Rate | 2 Verified Skills".
- How to Use: Review to identify strengths and areas for more vetting.
4. Integration with Other Sections
- Profile: Verified results add badges and boost match scores.
- Applications: Attach vetting proofs during submissions.
- Jobs/Employers: Search for roles requiring specific verifications.
- Messages: Direct communication with assigned recruiters.
Tips for Effective Vetting Requests
- Be Specific: Clearly define the area (e.g., "React.js Frontend Development" vs. "Programming") for accurate assessments.
- Start Free: Prioritize no-cost options to build your verified portfolio.
- Time Strategically: Request vetting before major applications to include proofs.
- Prepare Evidence: Gather docs/certificates in Files beforehand for quick uploads.
- Mobile Optimization: Forms adapt to touch; tests may require desktop for coding.
- Cost Management: Budget for premium verifications; track in the Cost column.
- Privacy: Requests are secure; share only with trusted recruiters. You control visibility.
- Maximize Impact: Aim for 3-5 key verifications matching your target roles.
Troubleshooting and Support
- Request Stuck?: Refresh or contact support if status hasn't updated in 48 hours.
- Test Access Issues?: Ensure browser compatibility; try incognito mode.
- Cost Disputes?: Free requests shouldn't charge—report to support@sira.jobs.
- No Recruiter Response?: Use the follow-up feature or check Messages.
- Help Resources: ❓ icon for tooltips; refer to Profile Guide for integrating results.
Elevate your candidacy with verified skills. For application tips using vetting proofs, see the My Applications Manual. If you need guidance on choosing vetting areas, update your profile skills first!
Request confidently—verified talent opens doors to top opportunities.